

Founder | BPI® Energy Auditor Certified Professional
Most construction experts agree that plastic vapor barriers are the way to go when looking to keep your structures dry.
But there’s much debate about what kind of vapor barrier plastic is best and how thick it needs to be.
Polyethylene is the most popular type of plastic used for vapor barriers. It’s inexpensive and does an excellent job of keeping moisture out. Most builders recommend using 6 mil polyethylene, about the thickness of a heavy garbage bag.
This article provides an overview of the different types of plastic vapor barriers and how thick they need to be.
And if you’re looking for a calculator to see what installing a vapor barrier might cost you, try out our Vapor Barrier Cost Calculator here.
Read on to find out more.
Polyethylene Vapor Barriers

Polyethylene vapor barriers have been the go-to choice for many years. They come in various thicknesses, but 6 mil is the most common choice among contractors.
These plastic barriers are made from high-density polyethylene, a type of thermoplastic. That means they can be melted down and reformed into new products at the end of their life. This makes them environmentally friendly to some extent.
Polyethylene vapor barriers are also moisture-resistant and have suitable UV impedance. That means they’ll last a long time without degrading, even if exposed to the sun.
One downside of polyethylene vapor barriers is that they can be tricky to install. They must be adequately sealed at all edges and joints to create an effective vapor barrier.
Polypropylene Vapor Barriers

Polypropylene is another popular vapor barrier material made from a type of thermoplastic. This material is similar to polyethylene but has a few key differences.
Polypropylene is a bit more flexible than polyethylene. That makes it easier to work with during installation. But this also means it’s more likely to develop cracks or leaks over time.
However, polypropylene is more resistant to chemicals and heat than polyethylene. That makes it a good choice for areas that may be exposed to harsh cleaners or high temperatures.
Any thickness between 6 and 12 mils will work well for a polypropylene vapor barrier. But 8 to 10 mils is a perfect thickness to aim for. This is because polypropylene is more likely to puncture than polyethylene.
Cross-Laminated Polyethylene Vapor Barriers
Cross-laminated polyethylene (CLPE) vapor barriers are a newer type of barrier on the market.
They’re made by bonding multiple layers of polyethylene together, but they can also bond polyethylene to other materials like asphalt or plastic.
This creates a vapor barrier that’s much more durable and puncture-resistant than traditional polyethylene barriers. CLPE barriers can be between 6 and 20 mils thick, but we recommend going for 6 or 10 mils.
One downside of CLPE vapor barriers is that they’re more expensive than polyethylene or polypropylene barriers. But they’re worth the investment for their superior performance.
High-Density Polyethylene Vapor Barriers

High-density polyethylene (HDPE) vapor barriers are another effective type of barrier on the market.
They’re made from a denser, thicker form of polyethylene. This makes them more durable and resistant to punctures than traditional polyethylene barriers.
HDPE vapor barriers are available in various thicknesses, from 3 mils to 10 mils. The thicker the barrier, the more protection it will provide.
However, it’s essential to choose the right thickness for your needs. If you select a too-thin barrier, it won’t be as effective as you’d like. And if you choose one that’s too thick, you’ll waste money on the material you don’t need.
For example, a 3 mil HDPE vapor barrier is typically used under concrete slabs. It’s also used to line crawl spaces and basements.
A 10 mil HDPE vapor barrier is often used in outdoor applications, such as under decks and porches.
PVC Vapor Barriers
You are probably thinking:
“Why would I use a vapor barrier made from PVC? Isn’t that the stuff they make pipes out of?”
Yes, you are correct. PVC is most commonly known for being used in plumbing, but it also has many other uses.
PVC is a strong and durable material that can withstand high temperatures and is resistant to most chemicals. It is also an excellent vapor barrier material.
PVC vapor barriers are available in different thicknesses. Still, the most common thicknesses are 4, 6, and 8 mils.
4 and 6-mil PVC vapor barriers are typically used for residential applications, while 8-mil PVC vapor barriers are more commonly used in commercial applications.
PVC vapor barriers can be installed using different methods, but the most common installation method is to staple the vapor barrier to the wall studs.
Another installation method is to glue the vapor barrier to the insulation or lay it on the floor.
How To Choose the Right Vapor Barrier
We’ve gone over the different types of vapor barriers, but how do you choose the right one?
The answer depends on several factors, including:
The Type of Wall You’re Installing the Barrier On

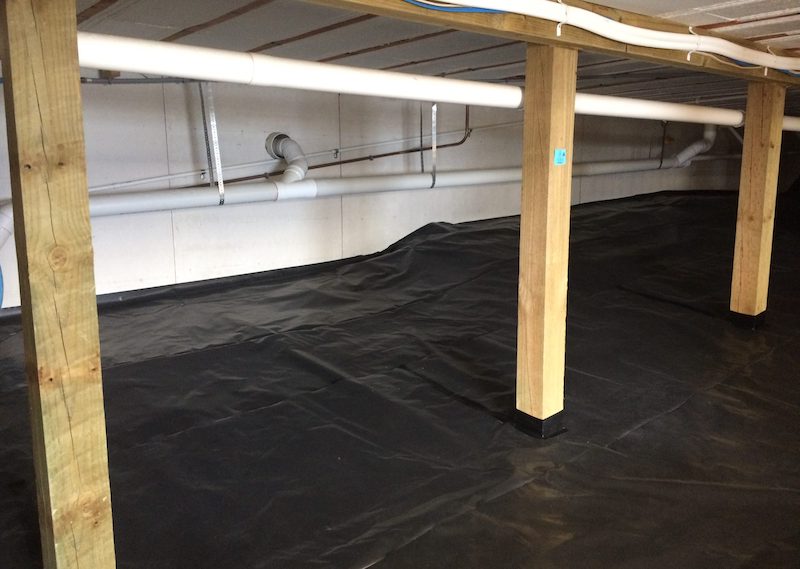
Let’s say you’re installing a vapor barrier in a crawl space. You would want to choose a vapor barrier that’s strong and durable, like a CLPE or HDPE vapor barrier.
Whereas, if you’re installing a vapor barrier on an exterior wall, you might not need a vapor barrier that’s as strong or durable. A polyethylene vapor barrier is likely sufficient.
The Climate You Live In

For those living in a warm climate, you might not need a vapor barrier that’s as thick as someone who lives in a cold environment.
Indeed in climate zones 1-3 in the US, a vapor barrier for external walls is not deemed necessary.
However, your circumstances might vary, so ensure you follow local code requirements and get suitable professional advice.
Your Budget
Of course, your budget is also a factor to consider when choosing a vapor barrier.
Thicker barriers will typically cost more than thinner ones. However, you should always choose the best vapor barrier you can afford.
After all, it’s better to spend a little extra money on a quality vapor barrier than to skimp and end up with a barrier that doesn’t do its job.
How To Install a Vapor Barrier
Installing a vapor barrier is pretty simple business, but there are some points you need to keep in mind.
- First, you need to ensure the surface on which you’re installing the barrier is clean, dry, and smooth. If there are any bumps or irregularities, they need to be sanded down before you can install the vapor barrier. You won’t believe how much of a difference this makes!
- Second, you must ensure the vapor barrier is sealed correctly. Any gaps or holes in the barrier will allow moisture to pass through. I like to use good-quality tape to seal the seams and edges of the vapor barrier.
- Third, you need to make sure the vapor barrier is adequately supported. This is especially important for thicker barriers. The last thing you want is for your vapor barrier to sag or collapse. However, most vapor barriers come with instructions on adequately supporting them.
- Fourth, you need to make sure the vapor barrier is installed correctly. If it’s not, it won’t be as effective at preventing moisture from passing through. This is where a professional installation comes in handy.
Can You Install a Vapor Barrier Yourself?
Installing a vapor barrier is a relatively simple job that most people can do themselves.
However, if you’re not confident installing the vapor barrier properly, it’s always best to hire a professional.
Hiring a professional has several advantages.
- They’ll be able to install the vapor barrier quickly and efficiently. Compare that to the time it would take you to do it yourself, and you’ll see why most people choose to outsource.
- They’ll be able to make sure the vapor barrier is installed correctly. As we mentioned before, if the vapor barrier isn’t installed properly, it won’t be as effective at preventing moisture from passing through. This means you will likely end up with moisture problems.
- They’ll be able to answer any questions you have about the installation process. This is important because, as we mentioned before, there are a few things you need to keep in mind when installing a vapor barrier.
If you’re not confident in your ability to install a vapor barrier, we recommend hiring a professional. It’s the best way to protect your investment from water and high humidity issues.
Final Thoughts On Vapor Barrier Plastic
So, there you have it!
Everything you need to know about vapor barrier plastic and how to choose the right one for your home
Remember that a thicker vapor barrier is better for resisting moisture passage but will also cost more.
Most builders recommend using a 6-mil vapor barrier for most applications.
However, if your home is in a location with high humidity or you are worried about moisture passing through your walls, you may want to use a thicker vapor barrier.
Whatever thickness you choose, ensure the vapor barrier is installed correctly, or it won’t work properly.
For information about installing a vapor barrier in your crawlspace, read our article here.