

Founder | BPI® Energy Auditor Certified Professional
Installing foam board insulation makes a big difference, especially when you combine it with spray foam to seal the edges. Fortunately, foam board insulation is one of the easiest installation methods you’ll come across.
If you want to handle the installation at home without hiring a professional, you’re in the right place.
Throughout this article, you’ll find step-by-step instructions on installing foam board insulation anywhere in your home. You’ll also learn how to deal with studs, drywall, and other obstacles.
We also have some affiliate links below for cheaper adhesive and other things to help with the installation. The price doesn’t change and you can choose to use them or not, but just letting you know!
So, let’s get dive in.
Where Do You Get Foam Board Insulation Anyway?
Before we start, we should probably touch on where you can get some foam board insulation. Unless you’re a professional insulation company and buying in bulk, your local hardware store is probably the best option.
The Benefits of Foam Board Insulation
We have actually written up a lot on the benefits in a few of our other articles, which you can check out our article here. To pull some information quickly from it:
Pros of Foam Board Insulation
- High R-Value
- Can prevent thermal bridging
- Controls moisture
- Prevents air leaks
- Effective above and below grade
Cons of Foam Board Insulation
- Cost can be higher than other types of insulation
- Proper installation required
- Not very structurally strong
- Sensitive to UV light
You can also learn about the specifications, like R-Value and insulating properties, which make foam board such an attractive insulation option.
So without further ado, here’s how you can install it!
How To Install Foam Board Insulation
To install foam board insulation, dry the area and remove excess debris, then measure and cut the foam boards to fit the walls. You can drill mounting screws through the foam or opt for an insulation adhesive to secure the panels. Finally, fill the gaps and seams with spray foam insulation.
Now let’s look at each of these steps in detail.
1.) Clean and Dry the Area
You shouldn’t add any insulation on dirty walls, studs, and wood panels. Instead, clean the area with a mixture of distilled vinegar and warm water. This combination removes excess debris while preventing mold, mildew, and bacterial growth. It also dries quickly, meaning you can install your insulation boards immediately.
Note: Never install any form of insulation over wet walls or studs. You’ll drastically increase the risk of unwanted contaminants. Instead, use floor fans to dry all moisture from the surface before heading to the next step in the process.
2.) Measure and Cut the Foam Boards
Foam insulation boards are relatively easy to cut with a box knife, circular saw, or by hand. First, measure the spaces between each stud unless the wall is flat without studs. Ensure the foam boards are the correct height for the walls, too. Always use a measuring tape and a permanent marker to notch the boards.

SFGate recommends immediately adding your chosen adhesive to the back of the cut foam boards. However, you’ll have to place them right away, which could make it a two-person job.
Follow these steps to cut your insulation boards without power tools:
- Measure the height and width of the area you want to insulate.
- Mark the measurements on the foam board.
- Dash the insulation board with a box cutter.
- Align the dashed and cut line with the edge of a table, then press down to break the insulation board.
3.) Choose Between Mounting Screws and Adhesives
Mounting screws are great if you have a lot of studs in the way. Some people place the insulation boards over the studs with insulation batts between each stud.
Use screws for this application or adhesives if you want to put the foam boards directly on the insulated wall. You can use both methods for additional security.
If you use mounting screws, make sure you get concrete or wood screws to fit the insulated surface. Using wood screws through foam boards and concrete won’t hold them in place for long.
Spray insulation adhesive is perfect for foam boards. This spray dries relatively quickly, so you don’t have to wait too long before the next step.
Spray it on the back of the board and the surface you want to stick it to. Then, place and hold the panel on the surface and wait for a few minutes until it dries.
4.) Attach the Insulation Foam Boards to the Wall
Place the panels between or over the studs, then use the security method mentioned above (screws or glue) to adhere them to the wall. If you want to double the insulation, place insulation batts between the studs and screw the boards to each stud.
Make sure there aren’t any gaps or clumped insulation batts to prevent uneven insulation issues, such as thermal bridges.
The foam insulation boards should be within a quarter of an inch (0.64 cm) of the ceiling and both sides. This gap allows you to use expanding spray foam but won’t allow heat to escape through the cracks.
We recommend leaning 2 x 4s (0.6 x 1.2 m) against each insulation board while it dries to the wall. Most adhesives take between 30 minutes and 24 hours to bond.
Check the label of your chosen glue to know the exact bonding time. You don’t need to use 2 x 4s (0.6 x 1.2 m) or bonding times if you prefer mounting screws.
You can check this helpful YouTube tutorial to learn more about installing foam board insulation on walls or between studs:

5.) Fill the Gaps With Spray Foam Insulation
Insulation is only effective when there aren’t any gaps. Use spray foam or insulation tape to seal the seams and exposed gaps between each board.
It would be best if you also used these sealants between the studs and the top and bottom of each foam board. Foam insulation boards prevent thermal bridging only when they’re adequately sealed.
Note: Never hover over the same area for longer than a second when using any spray foam. Spray foam expands quite a bit, which means that too much in one spot can shift the insulation boards.
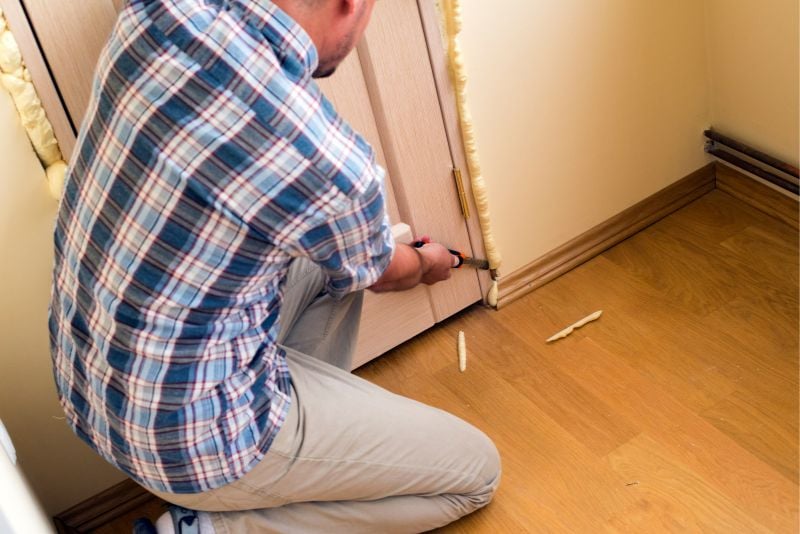
Insulation spray foam comes in a large can with a precision applicator. You can use it in gaps up to an inch (2.54 cm), though it’s ideal for keeping your insulation gaps about 25% of that distance. It works on wood, plastic, metal, glass, and many insulation materials.
6.) Install Drywall Over the Foam Board Insulation
HVAC Seer explains there has to be something covering the foam board insulation since it’s incredibly flammable. In fact, it’s against most fire codes not to cover your foam board insulation with a 30-minute fire-rating material.
Drywall is naturally fire-resistant, making it the perfect low-cost solution.
Nail the drywall into each of the studs as you usually would. The studs are typically 16 inches (41 cm) apart, so you’ll need a stud finder to locate, hammer, or screw each stud through the drywall.
Final Thoughts
Contrary to popular belief, you should never leave any insulation exposed. Most insulation boards are flammable, which means they need a protective barrier.
There are many ways to seal your foam board insulation and protect it from the elements. Once you’ve added the drywall, you can paint it to create a stylish look in your home.